AKS with AAD Pod Identity
Adding Pod Identity magic for granular access to Azure resources
The Azure AD Pod Identity allows you to configure access to cloud resources like DNS, Key Vault, ACR, or Blob Storage to Kubernetes pods.
In a previous article, I covered how use a managed identity, associated with the default node pool (VMSS) to allow access to an Azure DNS zone. Such a setup allowed unfettered access by any pod running in the default node pool. This is not only potentially dangerous, in infosec, this violates PoLP (Principle of least privilege). With AAD Pod Identity, access will be restricted to only the pods that need access.
This guide will show how to install and configure AAD Pod Identity so that Kubernetes addons external-dns and cert-manager can access the Azure DNS zone. These addons will automate DNS record upserts and issuing X.509 certificates so that web traffic can be secured. A small demo application will be used to show how this is all comes together.
UPDATE (2022–05-22):
- Separated DNS Zone and AKS cluster resource groups as most professional environments will manage these in separate groups.
- Updated and tested latest versions of
ingress-nginx,cert-manager, andexternal-dnshelm charts.
Steps in Tutorial
This tutorial guide will run through the following steps:
- Create Azure DNS and AKS resources
- Enable and Install AAD Pod Identity (managed mode)
- Create a managed identity for Azure DNS access
- Create pod identity bindings for
cert-managerandexternal-dns - Install K8S addons:
cert-manager,external-dns,ingress-nginx - Deploy
hello-kubernetesthat uses aningress
About Pod Identity Authorization
This guide will cover using managed mode, where the operator (you) will install the necessary AzureIdentity and AzureIdentityBinding resources, which is associated to a managed identity (that you will also create) to the desired target pod.
NOTE: In managed mode, MIC (Managed Identity Controller) will not be used.
When these components are installed, AKS resource provider will assign the specified managed identity to the virtual machine scale set (VMSS) of each node pool in the AKS cluster (ref).

The NMI (node managed identity) server will find which pods need access to Azure DNS through Azure Resource Provider, which checks the pod’s identity mappings (denoted by the binding icon in the above diagram).
The NMI server will then request an access token from Azure AD based on the pod’s identity mappings. This access token is then used by the pod to access the Azure DNS service.
Requirements
For this guide, you will need an Azure subscription (see free).
For secure traffic (HTTPS) you will need to manage a public domain (or subdomain) and point this to the Azure DNS zone after it is created.
You can alternatively use a private domain with Azure DNS zone, but you will be required to manage DNS or edit the /etc/hosts on your local system, so that it points to the public IP address.
Required tools
- Azure CLI tool (
az): command line tool that interacts with Azure API - Kubernetes client tool (
kubectl): command line tool that interacts with Kubernetes API - Helm (
helm): command line tool for “templating and sharing Kubernetes manifests” (ref) that are bundled as Helm chart packages. - helm-diff plugin: allows you to see the changes made with
helmorhelmfilebefore applying the changes. - Helmfile (
helmfile): command line tool that uses a “declarative specification for deploying Helm charts across many environments” (ref).
Optional tools
I highly recommend having a POSIX shell (sh) such as GNU Bash (bash) or Zsh (zsh). These scripts were tested on either of these shells on macOS and Ubuntu Linux.
Project Setup
The following file structure will be used:
~/azure_podid/
├── demos
│   └── hello-kubernetes
│       └── helmfile.yaml
├── env.sh
└── examples
    └── cert-manager
        ├── helmfile.yaml
        └── issuers.yaml
You can create this with the following commands:
Project environment variables
Setup these environment variables
You will need to set AZ_DNS_DOMAIN and ACME_ISSUER_EMAIL to what makes sense for your environment. If you use a private DNS domain, set ACME_ISSUER to letsencrypt-staging.
Azure components

Below are scripts that will provision Azure DNS and AKS. Installing AKS will create a resource group with six components provisioned:
- VMSS (VirtualMachine Scale Set) for the default node group
- Managed identity associated with the VMSS
- Load balancer (layer 4)
- Public IP address for the load balancer
- Virtual network for the nodes and pods
- Network security group,
Create Azure Resources: Azure DNS and AKS
You can provision Azure DNS and AKS with the following steps:
You can verify the installed components in the new Kubernetes cluster with the following command:
source env.sh
kubectl get all --all-namespaces
This should show something similar to the following:

Enable and Install AAD Pod Identity
In order to use the automation for AAD Pod Identity, the preview feature must be enabled. This can be done with the following commands:
Afterward, the AKS cluster can be updated to support AAD Pod Identity.
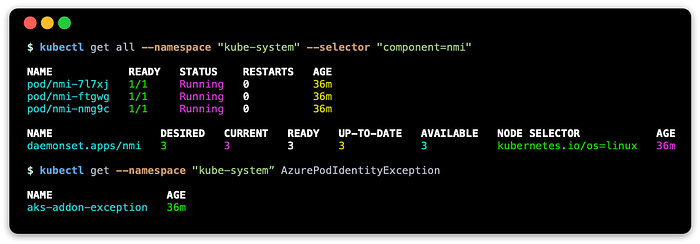
You can verify the components are installed with:
kubectl get all --namespace kube-system --selector component=nmi
kubectl get AzurePodIdentityException --namespace kube-system
The output should be something like this:
Create a Managed Identity
Run the commands below to create a managed identity with a role assignment that permits upserts to the Azure DNS zone that was created earlier.
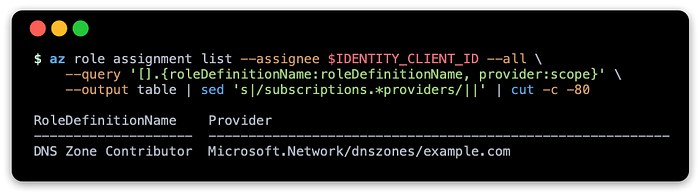
You can verify the role assignments with the following commands:
This should show something like the following depending on your domain name:
Kubernetes Components
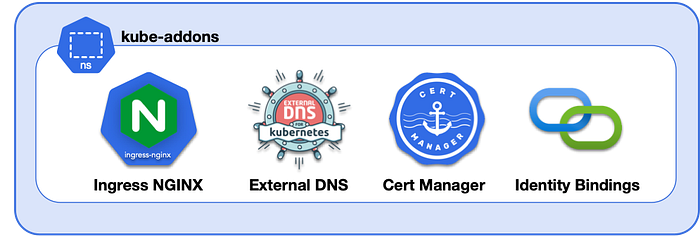
In this section, three popular Kubernetes addons will be installed:
- ingress-nginx: popular ingress controller built around OpenResty (NGINX + LUA nginx module)
- external-dns: popular tool that automates updating DNS records during deployment of your application through
service,ingress, and other resources. - cert-manager: automates issuance of X.509 certificates when deploying through
ingressor creating aCertficateresource.
Deploy Identity Bindings
Before installing the addons, the pod identity resources AzureIdentity and AzureIdentityBinding need to be configured to allow external-dns and cert-manager to access the Azure DNS zone.
Run these commands to create required bindings for external-dns and cert-manager.
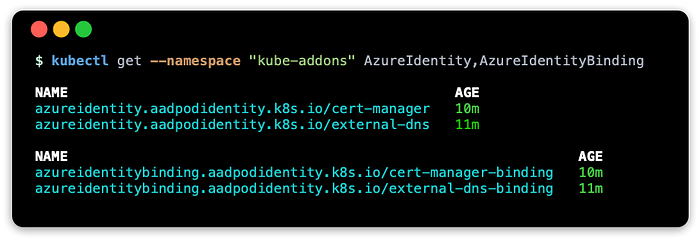
Afterward, this can be verified with the following command:
kubectl get \
  --namespace kube-addons \
  AzureIdentity,AzureIdentityBinding
This should output something like the following:
Kube Addons Helmfile
Copy the file below and save as examples/cert-manager/helmfile.yaml:
Cert Manager Issuers Helmfile
Copy the file below and save as examples/cert-manager/issuers.yaml:
Deploy addons and issuers
When ready, run the following commands to deploy cert-manager, external-dns, and ingress-nginx:
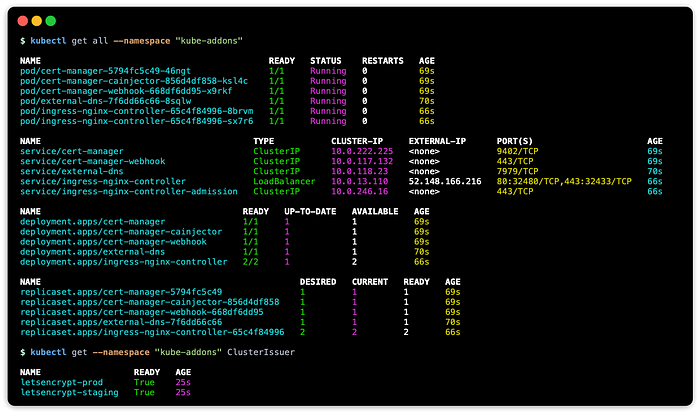
Afterward you can verify by running:
kubectl get all --namespace kube-addons
kubectl get --namespace kube-addons ClusterIssuer
This should show something like the following:
Demo Application: hello-kubernetes
Copy the file below and save as demos/hello-kubernetes/helmfile.yaml:
Select the Certificate Issuer
You will need to choose which issuer by setting the ACME_ISSUER environment variable. If you are using a public domain that can be verified, use the letsencrypt-prod. If you are using a private domain or want to test out the solution first, use letsencrypt-staging.
Deploy hello-kubernetes
When ready, run these commands (this assumes domain is a public domain):
source env.shexport ACME_ISSUER=letsencrypt-prod
helmfile --file demos/hello-kubernetes/helmfile.yaml apply
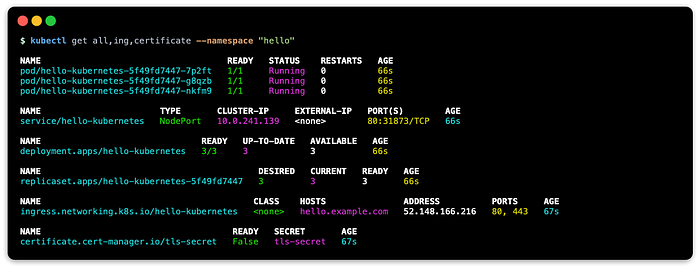
You can verify the results with:
kubectl get all,ing,certificate --namespace helloThis should show something like:
Verify hello-kubernetes
Point the browser the address using your domain, such as https://hello.example.com. This should land on one of the three pods:
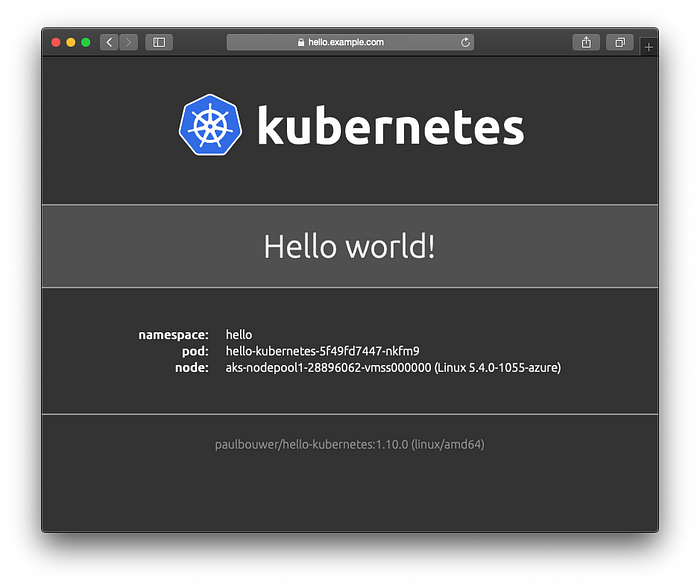
You’ll notice the padlock icon, which shows that the website is secured, as the certificate is verified against Let’s Encrypt's publicly trusted Certificate Authority.
Let’s Encrypt’s CA (ACME) will issue the certificate, when read-write to the Azure DNS zone can be verified with cert-manager, which was achieved using AAD Pod Identity.
Additionally, the DNS record was updated with hello address (A) record, because external-dns can upsert records in the Azure DNS zone because privileges granted through AAD Pod Identity.
Cleanup
The AKS cluster and subsequent resources, including persistent volumes, can be deleted with the following command:
az aks delete \
  --resource-group ${AZ_AKS_RESOURCE_GROUP} \
  --name ${AZ_AKS_CLUSTER_NAME}
The Azure DNS Zone can be deleted with:
az network dns zone delete \
  --resource-group ${AZ_DNS_RESOURCE_GROUP} \
  --name ${AZ_DNS_DOMAIN}
Resources
These are some resources I have come across when researching this article.
Blog Source Code
The blog source code contains more robust versions of these scripts that verify env vars.
Azure AD Pod Identity
- Best practices for authentication and authorization in Azure Kubernetes Service (AKS)
- Use Azure Active Directory pod-managed identities in Azure Kubernetes Service (Preview)
- Azure Active Directory Pod Identity for Kubernetes (main page)
- AAD Pod Identity: Role Assignment
External DNS
- Setting up ExternalDNS for Services on Azure: documentation on requirements needed for Azure DNS, AAD Pod Identities are not covered yet.
- HELM CHART: external-dns (Bitnami)
Cert Manager
- AzureDNS: Managed Identity Using AAD Pod Identities: documentation on how to configure AAD Pod Identities (standard mode) with cert-manager.
- HELM CHART: cert-manager
NGINX Ingress Controller
- NGINX Ingress Controller (
ingress-nginx) - HELM CHART: ingress-nginx
Related Articles
This articles delve further into the underlying technologies and concepts behind them.
- AKS with External DNS: covers using
external-dnswithservice(LoadBalancertype for external L4 LB) resource with access granted through system installed managed identity. - AKS with ingress-nginx: covers installing an ingress controller (L7 LB) and configuring external-dns with an
ingressresource. - AKS with Cert Manager: covering automating issuing X.509 certificates through
ingressresource in conjunction with external-dns. - AKS with gRPC and ingress-nginx: covering using ingress controller to balance mixture of HTTP and HTTP/2 (gRPC) traffic.
Conclusion
The major take away for this article are how to enable, install, and use AAD Pod Identity with AKS.
There are some bonus lessons that are used to demonstrate this feature:
- deploying applications with
kubectl,helm, andhelmfile. - using
external-dns(Azure DNS) with aningressresource - using
cert-manager(Let’s Encrypt verified on Azure DNS) - using
ingress-nginxingress controller - deploying an application that uses all of the above
This was a more challenging article, as documentation available publicly was a bit sparse or limited, and there were plenty of mistakes. This only encouraged me further, as I figured once I can gain competency in this area, I could help improve documentation for some popular open source.
I hope this material is useful, and thank you for following.