Spinnaker with Amazon ECR
Configure Spinnaker with Amazon ECR for Artifacts
This tutorial will cover how to set up Amazon ECR support and deploy a Spinnaker using the stable/spinnaker Helm chart on Kubernetes using Amazon EKS.
Overview
Spinnaker is a robust continuous delivery platform that enables you to quickly and easily implement and scale a continuous delivery pipeline (or continuous deployment). When working with Kubernetes, for your CD pipeline, you’ll need to access a Docker registry (or OCI compatible registry specifically) for your artifacts.
Within AWS cloud, Amazon ECR (Elastic Container Registry) is often used for this purpose. Amazon ECR poses some challenges to any CD solution, in that its token (password) frequently refreshes, so you need to rotate the token.
The Spinnaker community added a feature for this particular use case, which we’ll demonstrate during Spinnaker installation phase.
Prerequisites
These are some of the tools used in this tutorial and links to where to get them.
Required Tools

These are the tools required for this tutorial
- AWS CLI needed to interact with AWS cloud resources. A profile with administrative access should be setup.
- KubeCtl (koob-cuttle), the Kubernetes client tool, to interact with EKS.
- Helm to install applications on a Kubernetes cluster. This tutorial uses Helm v3 (referred to as
helm3), but Helm v2 works just fine as well. If you only have Helm v3 installed, you can runalias helm3=helmin Bash so that the instructions match. - Git to download source code with
git clone. - Docker CLI required for building and pushing docker images.
- Spin tool is useful for creating applications on Spinnaker on the command line.
Recommended Tools

These tools are optional, but can make your life a lot easier:
- EKSCtl (eks-cuttle or exseey-cuttle) tool to easily create an EKS cluster.
- Terraform CLI to manage Kubernetes and AWS resources, as well as create an EKS cluster.
- Halyard is used to setup and install Spinnaker clusters. This is not explicitly required on the host, but useful to interact with a Spinnaker cluster.
- Bash Shell is not strictly required, but the commands in this tutorial are tested and oriented toward
bash. [Note: this is default in mac OS and popular Linux distros, or msys2 with Windows].
Part 0: Setup Project and Prerequisites
We’ll organize everything under this directory:
export PROJECT_HOME=$HOME/projects/spinnaker-ecr
mkdir -p $PROJECT_HOME && cd $PROJECT_HOME
Download code files:
git clone https://github.com/paulbouwer/hello-kubernetesNote: If you have both Helm v2 and Helm v3 installed, make sure then you can use the commands helm2 and helm3. If you only have Helm v3 installed, then use this:
alias helm3=helmPart 1: Setup ECR Registry

We need to setup an artifact repository for our CD service. This will be a docker registry with Amazon ECR (Elastic Contianer Registry).
Create an ECR Registry
We’ll need to create a home to store our artifacts (docker images) for future use, which will be called hello-kubernetes. We can create this easily with AWS CLI:
aws ecr create-repository --repository-name hello-kubernetesWe’ll also want to save the repository URI that points the repository we just created. You can use this command to retrieve the URI as save it as the environment variable REPOSITORY_URI.
export REPOSITORY_URI=$(
  aws ecr describe-repositories \
    --repository-names hello-kubernetes \
    --query 'repositories[0].repositoryUri' \
    --output text
)
Walk-through Notes: This command will get a list of repositories filtered by the one we just created — just in case you have more than one repository. We then use JMESPath filter (query option) to get only the value we want and save that value as REPOSITORY_URI environment variable.
Building Image
From the code repository we fetched earlier, we can build our artifact, a docker image:
cd ${PROJECT_HOME}/hello-kubernetesdocker build \
  --no-cache \
  --build-arg IMAGE_VERSION="1.5" \
  --build-arg IMAGE_CREATE_DATE="`date -u +"%Y-%m-%dT%H:%M:%SZ"`" \
  --build-arg IMAGE_SOURCE_REVISION="`git rev-parse HEAD`" \
  --file Dockerfile \
  --tag "hello-kubernetes:1.5" .
Push Image to Registry
Now that we have our docker image, we need to push it into our ECR registry.
To get started, we must first do a docker login to the ECR registry, which we can do by running this:
$(aws ecr get-login --no-include-email)Now we can push our fist image into the hello-kubernetes ECR registry:
docker tag hello-kubernetes:1.5 ${REPOSITORY_URI}:v1.5
docker push ${REPOSITORY_URI}docker tag hello-kubernetes:1.5 ${REPOSITORY_URI}:latest
docker push ${REPOSITORY_URI}
You can see the results in AWS console and navigate to ECR service:
And then choose the region where the repository was created (should match the setting in your $HOME/.aws/config), and you should see something like this:

Note: Removed account number, as this would be different.
Part 2: Setup Amazon EKS Infrastructure
For this tutorial, you need to create an Amazon EKS infrastructure where worker nodes have ability to read from the ECR Registry.
Below are instructions for using either eksctl or Terraform to stand up a basic Amazon EKS cluster.
Method A: Using eksctl tool

With the eksctl tool, we can easily stand up an Amazon EKS cluster with minimal complexity. This cluster’s worker nodes will have the ability to fetch Docker images from ECR registry with the full-ecr-access option.
export TIMESTAMP=$(date +%s)
export CLUSTER_NAME=attractive-sculpture-${TIMESTAMP}eksctl create cluster \
  --name=${CLUSTER_NAME} \
  --full-ecr-access \
  --kubeconfig=${PROJECT_HOME}/${CLUSTER_NAME}-kubeconfig.yaml
After roughly 20 minutes, the process should be finished, which we can test using this following:
export KUBECONFIG=${PROJECT_HOME}/${CLUSTER_NAME}-kubeconfig.yaml
kubectl get all --all-namespaces
Method B: Using Terraform tool

We can create the same infrastructure using AWS terraform modules through a wrapper module I created called eks-basic.
Setup
We’ll need to setup some environment variables before running the module:
TIMESTAMP=$(date +%s)export TF_VAR_eks_cluster_name=attractive-sculpture-${TIMESTAMP}
export TF_VAR_region=$(aws configure get region \
  --profile ${AWS_PROFILE:-"default"}
)
Create Terraform Code
Create a file called eks_cluster.tf with the following contents:
You can create this on the command line with the following command:
cat <<-TFEOF > ${PROJECT_HOME}/eks_cluster.tf
variable region {}
variable eks_cluster_name {}module "eks-cluster-with-ecr" {
  source           = "github.com/darkn3rd/eks-basic?ref=v0.0.2"
  region           = var.region
  eks_cluster_name = var.eks_cluster_name  workers_additional_policies = [
    "arn:aws:iam::aws:policy/AmazonEC2ContainerRegistryPowerUser"
  ]
}TFEOF
Initialize and Install
Initialize the modules and providers and create a new EKS cluster:
terraform init
terraform apply
This will create a local kubeconfig file that we can use to access the cluster.
Verify Cluster is Working
We can use this to verify the cluster.
FILENAME=${PROJECT_HOME}/kubeconfig_${TF_VAR_eks_cluster_name}
export KUBECONFIG=$FILENAMEkubectl get all --all-namespaces
Part 3: Deploy Spinnaker Infrastructure

Now comes the time to deploy the Spinnaker infrastructure. We’ll use the stable/spinnaker helm chart. This helm chart is a two stage process:
- Install Minio, Redis, and Halyard pods
- Run a Kubernetes Job with instructions to Halyard for installation of numerous Spinnaker components.
Background
The challenge with Amazon ECR is that the token or password refreshes frequently, so whatever value you configure statically as the password for a docker-registry account with Spinnaker will be invalid after a brief period of time.
An alternative would be to pass a password-command instead, which is then used by CloudDriver to refresh the token automatically. All of this is done through the Spinnaker configuration tool called Halyard, which we’ll demonstrate later.
Create Helm Chart Values
We need to create a Helm chart values file, which will override the default values.
Create a file spinnaker.template.yaml with the curent content:
spinnaker.template.yamlYou can download the above with this command:
GIST_ID=04a5d659b4f6fd319c902663b13dccbb
GIST_FILE=spinnaker.template.yaml
GIST_PATH=darkn3rd/$GIST_ID/raw/$GIST_FILEcurl -sOL https://gist.githubusercontent.com/$GIST_PATH
Edit Helm Chart Values
We need to change some values in the spinnaker.template.yaml file. With some bash and sed kung-fu and save the results as spinnaker.values.yaml:
# set variables
MY_REGION=$(aws configure get region \
  --profile ${AWS_PROFILE:-"default"}
)MY_ACCOUNT=$(aws sts get-caller-identity \
  --query 'Account' \
  --output text
)MY_ECR_REGISTRY_NAME=my-ecr-registry# output chart values from template
sed -e "s/REPLACE_REGION/${MY_REGION}/"  \
    -e "s/REPLACE_ACCOUNT/${MY_ACCOUNT}/"  \
    -e "s/ECR_REGISTRY_NAME/${MY_ECR_REGISTRY_NAME}/" \
    $PROJECT_HOME/spinnaker.template.yaml \
       > $PROJECT_HOME/spinnaker.values.yaml
Add Stable Charts Repository
If this has not been done for other projects, we need to add the stable charts repository to install charts from it.
helm3 repo add stable \
  https://kubernetes-charts.storage.googleapis.com/
Install Spinnaker Chart
Now that we have our override values (spinnaker.values.yaml) set to the desired variables, we can go ahead and install Spinnaker into our Kubernetes cluster.
# make sure we point to the same cluster
export KUBECONFIG=${PROJECT_HOME}/${CLUSTER_NAME}-kubeconfig.yaml# install using helm3
helm3 install \
  --values $PROJECT_HOME/spinnaker.values.yaml \
  --generate-name \
  --timeout 5m \
  --wait \
  stable/spinnaker
Verify Success of Spinnaker Installation
Once this completes after some time. Once completed, we should get alist of pods, to see if the services are up:
kubectl get pods | \
  awk '/^spin-/{ printf "%-40s %s %s %s\n", $1, $2, $3, $5 }'
You should see something like this:
spin-clouddriver-7b5b7c495d-9p8wd        1/1 Running 7m15s
spin-deck-c9f959796-m2pxv                1/1 Running 7m17s
spin-echo-95f99b745-grdtm                1/1 Running 7m18s
spin-front50-d7b454cc4-fgkdv             1/1 Running 7m12s
spin-gate-6946946fc9-6569m               1/1 Running 7m15s
spin-igor-7d9bb84756-g5qgq               1/1 Running 7m18s
spin-orca-6dfc9bb875-bfcnr               1/1 Running 7m16s
spin-rosco-587949fc75-lmvjf              1/1 Running 7m12s
You can watch the installation process is taking place through Halyard tool by running the following command:
JOB_NAME=$(kubectl get pods | \
  awk '/spinnaker-.*-install-using-hal/{print $1}'
)kubectl logs job.batch/$JOB_NAME --follow
Should you need to run further Halyard commands or inspect it’s final configuration ($HOME/.hal/config) you can run:
HALYARD_POD=$(kubectl get pods | \
  awk '/spinnaker-.*-spi-halyard-0/{print $1}'
)kubectl exec -ti $HALYARD_POD bash
Forward Spinnaker Ports to LocalHost
Spinnaker is only available on a private subnet that is not accessible to the Internet. To access our private cluster through a web interface dashboard, we need to map both the Spinnaker API (Gate) and Spinnaker UI (Deck) to our system (localhost).
export DECK_POD=$(kubectl get pods \
  --namespace default \
  --selector "cluster=spin-deck" \
  --output jsonpath="{.items[0].metadata.name}"
)export GATE_POD=$(kubectl get pods \
  --namespace default \
  --selector "cluster=spin-gate" \
  --output jsonpath="{.items[0].metadata.name}"
)kubectl port-forward --namespace default $DECK_POD 9000 &
kubectl port-forward --namespace default $GATE_POD 8084 &
After this you should be able to log into localhost:9000.
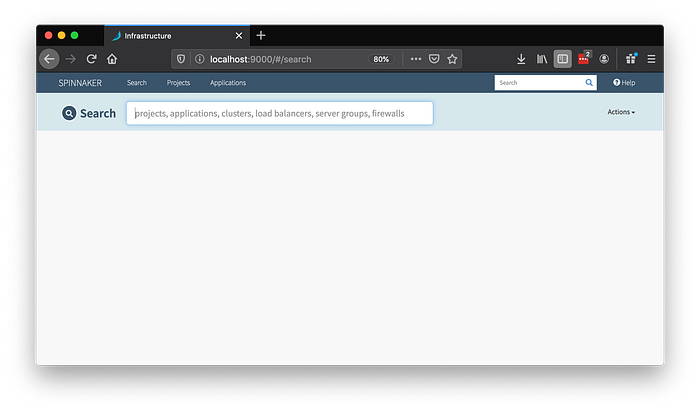
There isn’t much happening with the intial splash screen, but that will change soon.
Part 4: Setup Spinnaker Pipeline triggered by ECR

Now it’s time to configure changes inside the Spinnaker application itself. We’ll configure a pipeline that will deploy the hello-kubernetes application. This will be triggered automatically by new docker images added to the hel
Create Application
To get started with creating a pipeline, we need to first create an application. We can do this with the spin tool listed in the Prerequistes section.
spin application save \
--application-name my-app \
--owner-email someone@example.com \
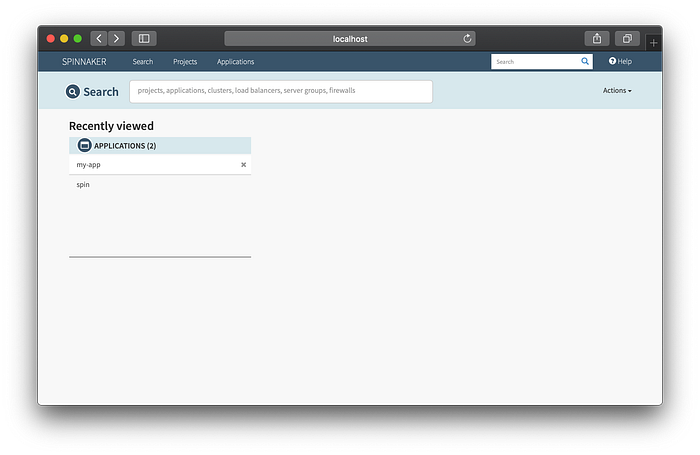
--cloud-providers kubernetesYou can verify results in the command line:
spin application get my-appAfterwards, this should appear in the Spinnaker UI:
Upload Pipeline
Now we will upload a pipeline that was created earlier. You can download it
GIST_ID=8f1725132e9678fb890f61424d657dc6
GIST_FILE=hello-kubernetes.template.json
GIST_PATH=darkn3rd/$GIST_ID/raw/$GIST_FILEcurl -sOL https://gist.githubusercontent.com/$GIST_PATH
Similar to how we edited the intial Helm chart values, we’ll need to edit parameters in the pipeline file to refer to our environment:
# set variables
MY_REGION=$(aws configure get region \
  --profile ${AWS_PROFILE:-"default"}
)MY_ACCOUNT=$(aws sts get-caller-identity \
  --query 'Account' \
  --output text
)MY_ECR_REGISTRY_NAME=my-ecr-registry# configure pipline from template
sed -e "s/REGION/${MY_REGION}/"  \
    -e "s/ACCOUNT/${MY_ACCOUNT}/"  \
    -e "s/ECR_REGISTRY_NAME/${MY_ECR_REGISTRY_NAME}/" \
    $PROJECT_HOME/hello-kubernetes.template.json \
       > $PROJECT_HOME/hello-kubernetes.json
Now we can upload the pipeline:
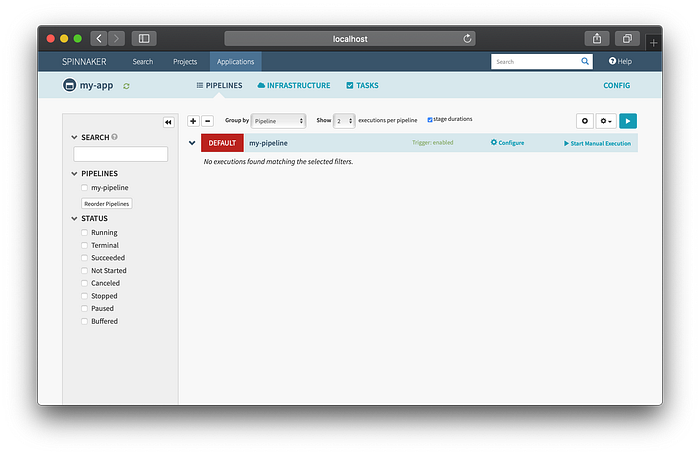
spin pipeline save -f hello-kubernetes.jsonWe can look at the pipeline we uploaded with:
spin pipelines list --application my-apIn the Spinnaker UI, we can click on the my-app application, and see our pipeline:
Part 5: Manually Testing Pipeline
For this part, we will manually test the pipeline to verify that it works correctly.
Manually Trigger the Pipeline
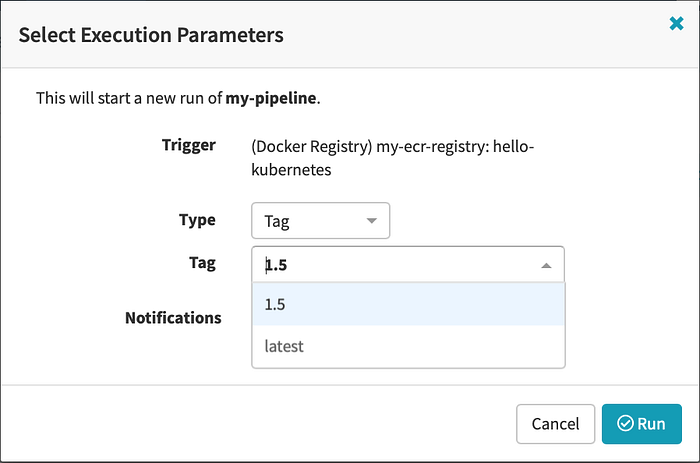
Run through the following steps in the Spinnaker UI:
- Click on the
my-appapplication if not there already. - In the
my-pipelinepipeline, click onStart Manual Execution. - In the dialog select either
latestorv1.5tag. - In the dialog, click on
Runbutton.
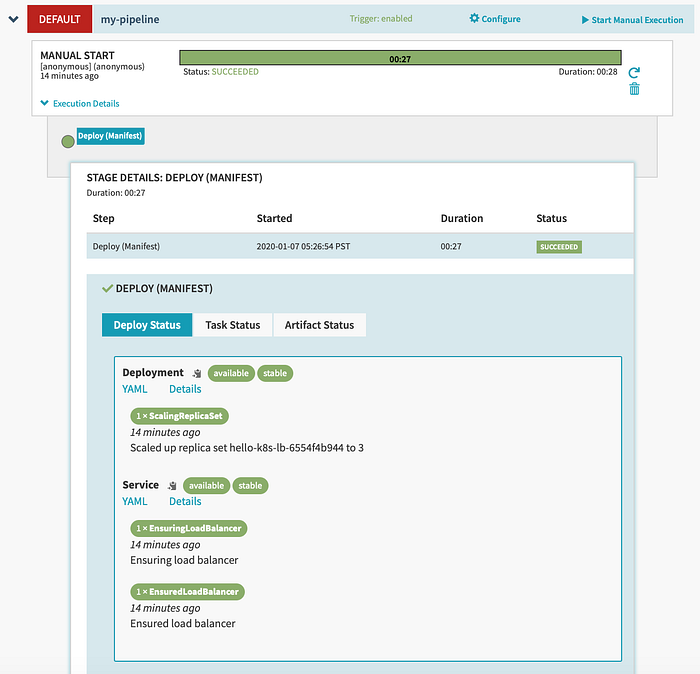
After clicking Run, we’ll see a status bar:

We can click on the Execution Details to see live updates. Once completed, it should look something similar to this:
Verify Deployment by the Pipeline
Now continue further this these steps.
- Now click on the area called
INFRASTRUCTURE, which should bring you toLoad Balancersarea. - Click on the
Defaultfield to bring up a side bar on the right. - Scroll down to the area under
STATUS, and click on the link underIngress.

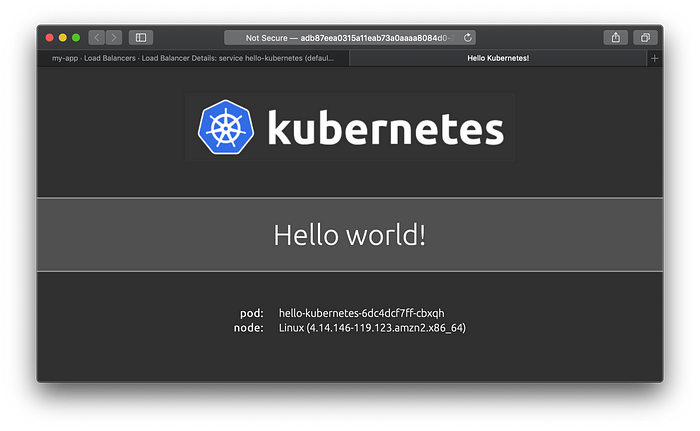
Initially, after deployment, you may see nothing, because it will take a few minutes for a new LoadBalancer to be created. Eventualy, you should see the following.
Part 6: Trigger Pipline by Pushing Artifact
Now we can test that the trigger works effectively by updating the source code in hello-kubernetes, building a new docker image, and then pushing the docker image to the hello-kubernetes ECR repository.
Update Source Code
Run this to build a new Docker image after updating the source code.
cd ${PROJECT_HOME}/hello-kubernetessed -e 's/#303030/#003399/' \
    -e 's/#505050/#3366cc/' \
    -e 's/#909090/#909090/' \
    static/css/main.css > new.css
mv new.css static/css/main.cssdocker build \
  --build-arg IMAGE_VERSION="1.6" \
  --build-arg IMAGE_CREATE_DATE="`date -u +"%Y-%m-%dT%H:%M:%SZ"`" \
  --build-arg IMAGE_SOURCE_REVISION="`git rev-parse HEAD`" \
  --file Dockerfile \
  --tag "hello-kubernetes:1.6" .
Push a new Docker Image
This process will push a new image into the ECR repository. You may want to look have the Spinnaker UI opened in the my-app Application to view the pipeline activate automatically.
$(aws ecr get-login --no-include-email)docker tag hello-kubernetes:1.6 ${REPOSITORY_URI}:v1.6
docker push ${REPOSITORY_URI}docker tag hello-kubernetes:1.6 ${REPOSITORY_URI}:latest
docker push ${REPOSITORY_URI}
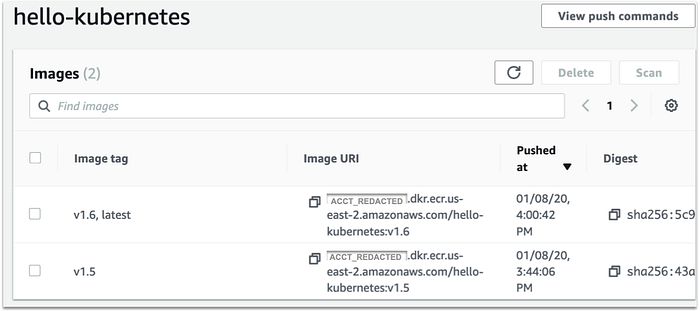
Aftewards, the hello-kubernetes ECR repository should have these:
Verify New Release
Spinnaker will automatically deploy the new versioned (tagged) docker image that was published to the hello-kubernetes ECR repository.
You can use the same steps before with the manual deploy to verify the results:
- Now click on the area called
INFRASTRUCTURE, which should bring you toLoad Balancersarea. - Click on the
Defaultfield to bring up a side bar on the right. - Scroll down to the area under
STATUS, and click on the link underIngress.
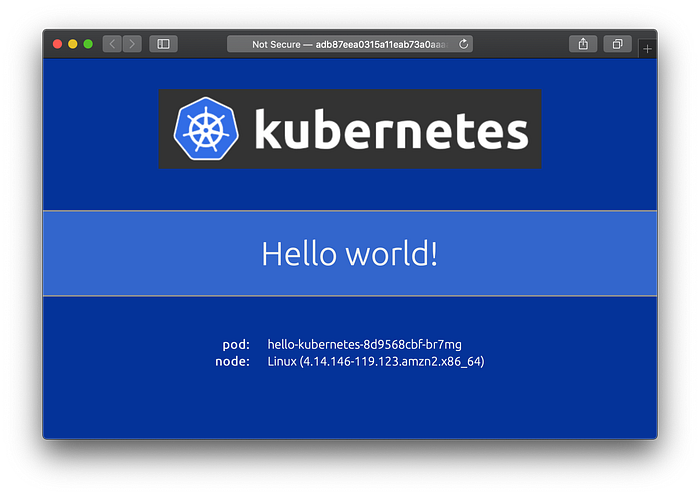
We should see something similar to this:
Cleanup
Remove Hello-Kubernetes Application
kubectl delete deployment.apps/hello-kubernetes
kubectl delete service/hello-kubernetes
Remove Spinnaker Application
SPINNAKER_APP=$(helm3 ls | awk '/^spinnaker-/{print $1}')
helm3 delete $SPINNAKER_APP
There may be some left overs, which we can finish off with:
kubectl get jobs | \
  awk "/$SPINNAKER_APP/{print \$1}" | \
  xargs -I {} kubectl delete job.batch/{}kubectl get pvc | \
  awk "/$SPINNAKER_APP/{ print \$1 }" | \
  xargs -I {} kubectl delete pvc/{}
Delete Cluster Created with eksctl
eksctl delete cluster --name=$CLUSTER_NAMEDelete Cluster Created with Terraform
cd ${PROJECT_HOME} && terraform destroyResources
Spinnaker Documentation
Refresh Method with SideCar Container
Previously, the only way to refresh the ECR token (password) was to use a side car containers. Though this is not needed anymore, the documentation provides some insight into Spinnaker:
Conclusion
I hope this solution was useful for show casing a little how to create a simple continuous deployment solution with Spinnaker, and also show how to hook into Amazon ECR.
I personally like Spinnaker, as it delineates a clean seperations between CI and CD, where CI would normally hook into a code repository like GitHub, and the CD would hook into an artifact repository like a docker registry implementation such as Amazon ECR.
Thank you for following along and best of success with your CD implementation.