Python VirtualEnv
Got to Keep ’em Separated
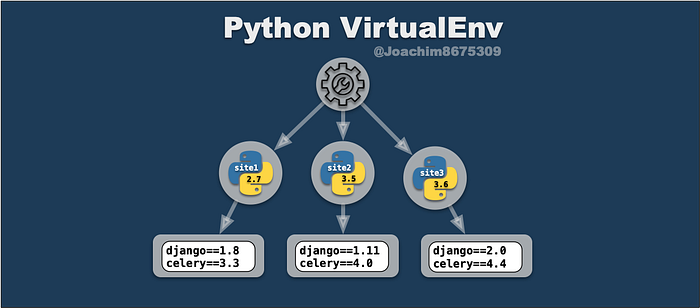
When managing a Python project, there comes a time to keep Python packages separated from your main environment. There may be incompatible versions that clobber each other, and you can get into potentially bizarre indeterministic behavior.
To avoid these things, you need to create segregated environments, and historically, virtualenv has been just the tool to do this in the Python universe.
This guide demonstrates how to use virtualenv to isolate your Python environments. But first…
Getting Python
You need Python obviously. If you have python already, skip ahead.
The one question is which Python, which Python? Both Pythons?
- Python 2
- Python 3
I’ll leave that up to you, as this guide should work with both.
The pyenv Option
The best way in my experience, is to use a pyenv to install either or exact python2 and python3 python versions. This is an easy way to control the exact python version on *nix systems like macOS, FreeBSD, and Linux.
If you are content with using the python installed with package managers, you can use them instead.
macOS Python
You can install a local python for your current user with Homebrew:
brew install python@2Python on macOS can be challenging due to existing bugs inherited from Python. See: https://docs.brew.sh/Homebrew-and-Python. Consider pyenv as an alternative.
Windows Python
You can use Chocolatey to install Python:
choco install python2Linux: Ubuntu 16.04
Ubuntu already comes with Python. You can use this to both Python versions, Python 2 and Python 3 environments on Ubuntu.
# upgrade latest pythons
sudo apt-get update
sudo apt-get -y upgrade# install pip package manager (required)
sudo apt-get install -y python-pip python3-pip# install compilers/libraries (required for some packages)
sudo apt-get install -y \
 build-essential \
 libssl-dev \
 libffi-dev \
 python-dev
Getting VirtualEnv
The tool virtualenv runs on both Python2 and Python3.
pip install virtualenvUsing VirtualEnv
Now we can create a new python virtual environment:
mkdir -p ~/.virtualenvs
virtualenv ~/.virtualenvs/myproj
Activate the virtual environment, and install a package like flask.
source ~/.virtualenvs/myproj/bin/activate
pip install flask
We can see the packages installed with pip list:
Package      Version
------------ -------
Click        7.0
Flask        1.0.2
itsdangerous 1.1.0
Jinja2       2.10
MarkupSafe   1.1.0
pip          18.1
setuptools   40.6.2
Werkzeug     0.14.1
wheel        0.32.3
Deactivate the environment:
deactivateAfter leaving the virtual environment, you can see that packages in our main environment are quite different, as you can see with pip list:
pip (8.1.1)
pycrypto (2.6.1)
setuptools (20.7.0)
virtualenv (16.1.0)
wheel (0.29.0)
VitualEnvWrapper
There are some convenience tools virtualenvwrapper that offers a more intuitive user experience. Install and setup with the following:
# install
pip install virtualenvwrapper# setup workon area
mkdir -p ~/.virtualenvs
export WORKON_HOME=~/.virtualenvs# add wrapper functions
source ~/.local/bin/virtualenvwrapper.sh
For Windows users, you can virtualenvwrapper-powershell.
Using VirtualEnvWrappers
mkvirtualenv mynewproj
workon mynewproj
Before we begin, we can look at current packages with pip list:
Package    Version
---------- -------
pip        18.1
setuptools 40.6.2
wheel      0.32.3
Now install something, like Ansible:
pip install ansibleWe’ll have more packages now, as can be seen with pip list:
Package      Version
------------ -------
ansible      2.7.2
asn1crypto   0.24.0
bcrypt       3.1.4
cffi         1.11.5
cryptography 2.4.2
enum34       1.1.6
idna         2.7
ipaddress    1.0.22
Jinja2       2.10
MarkupSafe   1.1.0
paramiko     2.4.2
pip          18.1
pyasn1       0.4.4
pycparser    2.19
PyNaCl       1.3.0
PyYAML       3.13
setuptools   40.6.2
six          1.11.0
wheel        0.32.3
To leave the environment altogether, run:
deactivateSelecting Python Version
If you have multiple Python versions on your system, and would like to use a particular version of Python for your virtualenv, you can do this with the --python=/path/to/python option with either virtualenv or mkvirtualenv commands.
Example Usage
Here’s an example using Ubuntu 16.04 environment that has both python2 and python3 executables in the PATH:
# example of python2 project (virtualenv)
virtualenv --python=$(which python2) ~/.virtualenvs/site1
source ~/.virtualenvs/site1/bin/activate
pip install django==1.8# example of python3 project (virtualenvwrappers)
mkvirtualenv --python=$(which python2) site2
workon site2
pip install django==2.1.3
Automatic VirtualEnv with DirEnv
We can use a tool like DirEnv to do automation of our virtualenv or virtualenvwrapper tools when we enter a project directory.
Install DirEnv
For installation, on macOS, we can use brew insdtall direnv and on Ubuntu 16.04, we can do sudo apt-get install direnv . Other operating systems should have some similar procedure. See https://direnv.net/.
Setup DirEnv
We can setup and configure DirEnv for a python environment with this (in bash):
cat <<-'DIRENV_CONFIG' > ~/.direnvrc
layout_virtualenv() {
  local venv_path="$1"
  source ${venv_path}/bin/activate
}layout_virtualenvwrapper() {
  local venv_path="${WORKON_HOME}/$1"
  layout_virtualenv $venv_path
}
DIRENV_CONFIGeval "$(direnv hook bash)"
Note the above instructions are for the bash shell. If you need support for another shell see, https://direnv.net/.
The Python integration notes are from:
Using DirEnv
Now that we have DirEnv setup, let’s create some environment, using virtualenvwrappers as we did before.
# setup
export WORKON_HOME=~/.virtualenvs
source ~/.local/bin/virtualenvwrapper.sh# create virtualenv
mkvirtualenv deployprojs
Now we can create a new project, git clone a new repo, etc. and install some local project only packages.
mkdir -p myweb && cd myweb
echo 'layout virtualenv $HOME/.virtualenvs/deployprojs' > .envrc
direnv allow
pip install fabric
If we do a pip list | grep fabric, we get:
fabric 2.4.0For the first time, we’ll have to manually do a deactivate, but afterward, activating the project and deactivating the environment only involves switching into the project directory, such as the myweb example project.
Saving Environments
So save the packages in a package manifests for future use on another machine, we can run:
pip freeze > requirements.txtThis will capture our packages for future use in a requirements.txt file. On a new system, we can switch to the appropriate virtualenv, and then install the packages again:
pip install -r requirements.txtWrapping Up
This may seem complex, because, well, it is. The takeaways from this are:
- segregating both python platform and package versions
- freezing (saving) python package versions per project
- automating all of this using DirEnv
Important to mention, is that both virtualenv and virtualenvwrapper are just one solution, there are many others, such as these:
I documented these, as these have been around for a while and work consistently across both Python 2 and Python 3. Even with new solutions that might be better, you’ll likely come across virtualenv both professionally and in open source projects, so familiarity with this is important.


