Jenkins DevKit: Automating Jenkins
Part 2: Automating Jenkins Jobs and Pipelines
Previously we created a small JenkinsDevKit using Docker-Compose, and then automated installation of plug-ins and a basic configuration.
In this article, we’ll cover how to seed a Jenkins server with jobs and pipelines. We will use two plug-ins to do this magic:
- JobDSL: allows you to specify jobs using Groovy DSL
- Jenkins CasC (Configuration-as-Code): can seed a server with jobs configured using JobDSL jobs in YAML DSL.
- Jenkinsfile (Pipeline-as-Code): to run multi-stage process to build and test a service.
Previous Article
Highly recommend running through this tutorial that will show how to create initial Jenkins DevKit using Docker Compose, and automates plugin installation and initial server configuration:
Required Tools
You need the following environments:
- Docker: either Docker CE and Docker Compose for Linux; or Docker Desktop for macOS. [Windows not supported, see NOTE below]
- Bash shell (optional): instructions in this guide are oriented toward using Bash.
- Curl (optional): you may need to download scripts if you skipped the previous article.
NOTE: This guide for local dev environment will use Unix sockets. As Unix sockets are not supported in Windows, this guide will not work for Windows operating system.
Introduction to Pipeline As Code
Jenkins 2.0 introduced Pipelines, where you can define steps in a complex process that allows you…
to model, orchestrate and visualize [the] entire delivery pipeline.
The term Pipeline-As-Code represents using code to develop pipelines, rather than creating Pipelines in a web console. Jenkins 2.0 popularized this though use of Jenkinsfile scripts written in groovy language that allow you to script your stages and steps of a pipelines.
When creating a pipeline script, you have two approaches:
- declarative pipeline: DSL-like script using within a
pipeline {}block - scripted pipeline: imperative groovy script within a
node{}block
Declarative Pipeline Example
Below is an example of a declarative pipeline:
JenkinsfileThis declarative pipeline will use a generic ruby image as the build agent, and then runs the following activities in these steps:
- Install Bundler v2
- Install package manifest using bundler (
Gemfile) - Use
raketool to run the tests - Use Junit plugin to present results visually
Scripted Pipeline Example
In the scripted pipeline approach, you will have full control of every step of the code explicitly, which obviously requires more debugging, but has the advantage of giving you greater control.
JenkinsfileIn this example, the approach is different than using a generic ruby image to test the api server. We build an image and then run the tests within that image:
- Checkout the code specified in the
PipelineJobconfiguration - Build the docker image, which comes with our api server and test code
- Run tests within the image
- Use Junit plugin to present results visually
Automating Pipeline Jobs
In this section, we’ll create some jobs that use a declarative pipeline (Jenkinsfile) from the remote git repository. These will be a simple pipeline that will run tests on a build agent (which is either a generic ruby or python docker image).
The jobs themselves are defined using JobDSL and seeded on a new Jenkins server using Jenkins CasC (Configuration-as-Code).
Step 1: Project Home
We should have a current structure under $HOME/jenkins-kit directory that looks like this:
.
├── Dockerfile
├── docker-compose.yaml
├── jenkins.yaml
└── plugins.txt
We’ll add some more files with these commands:
cd ~/projects/jenkins-kit
mkdir jobdsl
touch jobs.yaml jobdsl/hello_{flask,ruby}.groovy
This will result in the following files:
.
├── Dockerfile
├── docker-compose.yaml
├── jenkins.yaml
├── jobdsl
│   ├── hello_flask.groovy
│   └── hello_sinatra.groovy
├── jobs.yaml
└── plugins.txt
Step 2: Existing Files
From the previous article, we should have the following files:
- Docker Compose script (
docker-compose.yaml) - Docker build script (
Dockerfile) - Plugins manifest (
plugins.txt) - Jenkins Configuration (
jenkins.yaml)
If you have not ran through previous article, you can quickly fetch them using curl:
# env vars for readability
GIST_PREFIX=https://gist.githubusercontent.com/darkn3rd
GISTID_PLUGIN_LST=5da788f00466e2d5d1b3d619710fc647
GISTID_DOCKERFILE=797e14b0a932250f87666a1aad6ea9ff
GISTID_JENKINSCFG=99d580e70bd5f7a1859466eba1583422
GISTID_DKRCOMPOSE=d11e68c5db184dd11a6c4bc5f6672b94# download files
curl -s $GIST_PREFIX/$GISTID_PLUGIN_LST/raw/ > plugins.txt
curl -s $GIST_PREFIX/$GISTID_DOCKERFILE/raw/ > Dockerfile
curl -s $GIST_PREFIX/$GISTID_JENKINSCFG/raw/ > jenkins.yaml
curl -s $GIST_PREFIX/$GISTID_DKRCOMPOSE/raw/ > docker-compose.yaml
Step 3: Create Job Configurations
We can use Jenkins CasC to configure jobs in addition to Jenkins server configuration. Jenkins CasC will then use JobDSL to create the jobs.
Add the following content to jobs.yaml:
jobs.yamlThis script will create a folder called testjobs, and then seed the Jenkins server with two jobs that are fetched from the local file system.
We could easily embed the full JobDSL groovy script in the YAML, but personally I find that embedded scripts inside YAML are less readable and harder to maintain.
Step 4: Create Pipeline Jobs
In the previous article, I referenced two repositories for using Sinatra and Flask web microframeworks to do a small hello-world demo API:
We can create new Pipeline jobs that will load a pipeline script (Jenkinsfile) from the remote repository.
First edit the jobdsl/hello_flask.groovy script and add this:
jobdsl/hello_flask.groovyNext edit the jobdsl/hello_sinatra.groovy script and add this:
jobdsl/hello_sinatra.groovyStep 4: Update Docker Compose Script
Now that we have our jobs defined, we need to update the docker compose script to support seeding Jenkins with these jobs at startup.
The two magical lines of note:
- ./jobs.yaml:/var/jenkins_home/casc_configs/jobs.yaml - ./jobdsl:/var/jenkins_home/casc_configs/jobdsl/This adds our jobs.yaml CasC script to the designated directory defined by CASC_JENKINS_CONFIG env variable.
The other line just mounts the directory containing the JobDSL groovy scripts into the container, so that CasC can access them.
Step 5: Test the Solution
Now with everything ready to go, we can bring up our local Jenkins DevKit environment:
docker-compose build
docker-compose up
Once it comes up, you can point your web browser to http://localhost:8080.
Running Pipeline Jobs
On the Jenkins server (http://localhost:8080), and you’ll see the testjobs folder with the two jobs we created.
Instead of using the default Jenkins UI, click on the BlueOcean item on the left to bring up this interface.
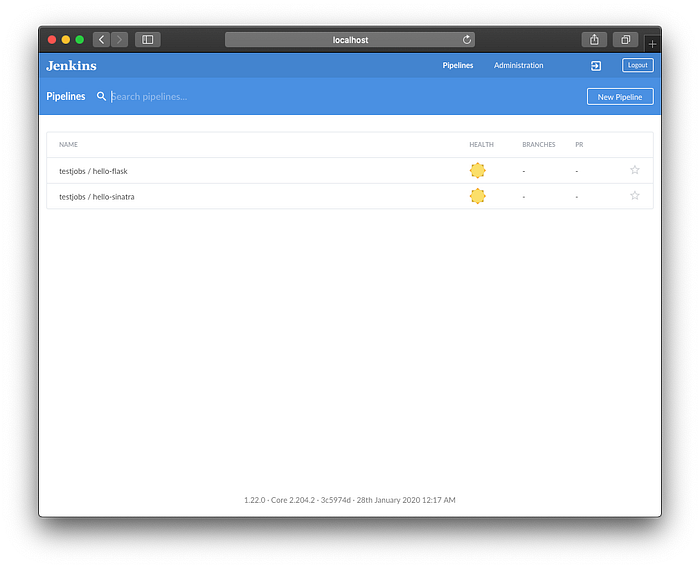
Click on the testjobs / hello-flask and run it.
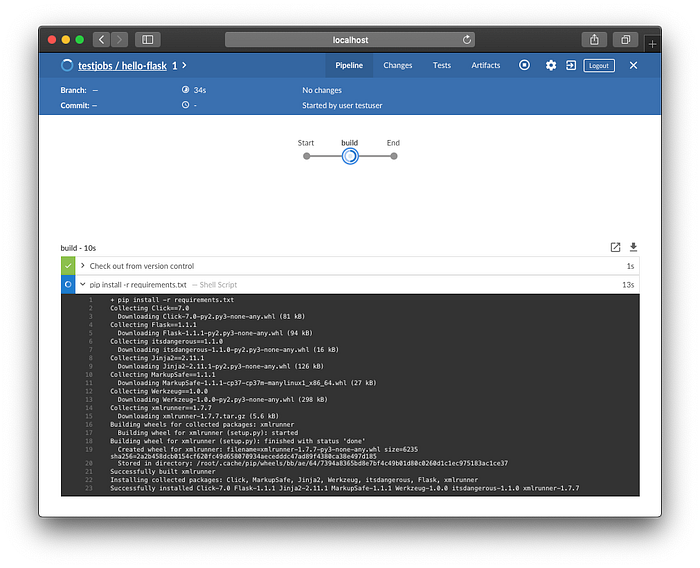
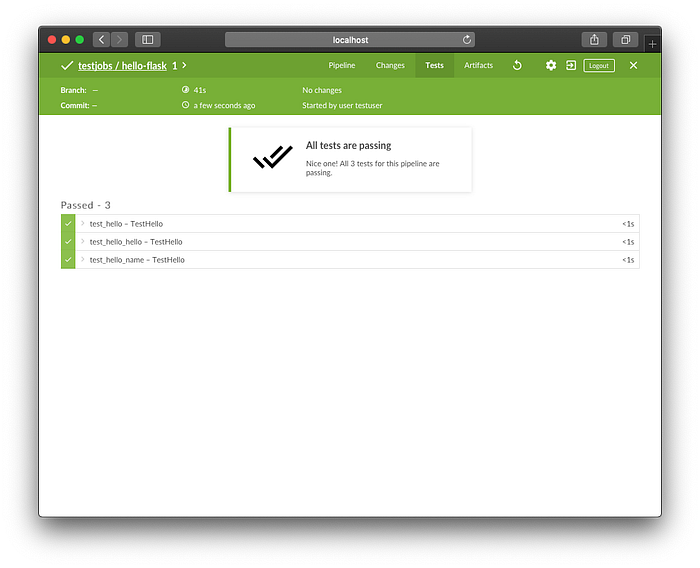
This will run through installing python module requirements, and running the tests. When completed, you can see the results by clicking on the Tests button at top.
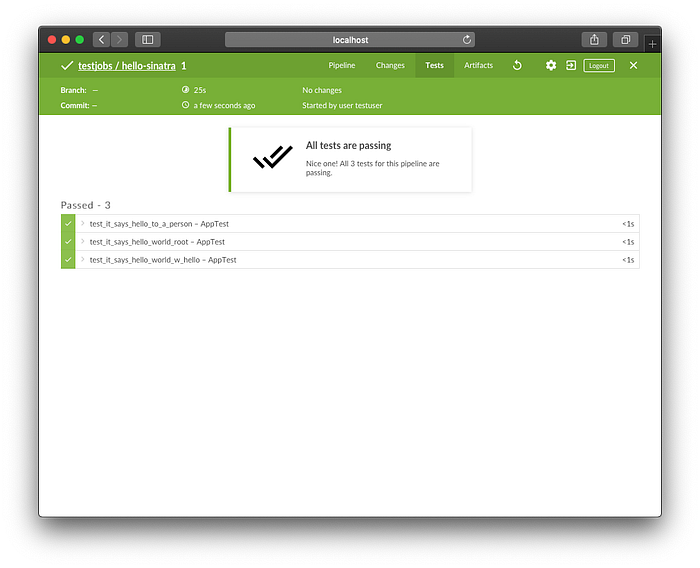
You can click on the testjobs / hello-flask in the upper left, then Jenkins to get back to where we were, and now click on testjobs / hello-sinatra, and when prompted, hit Run.
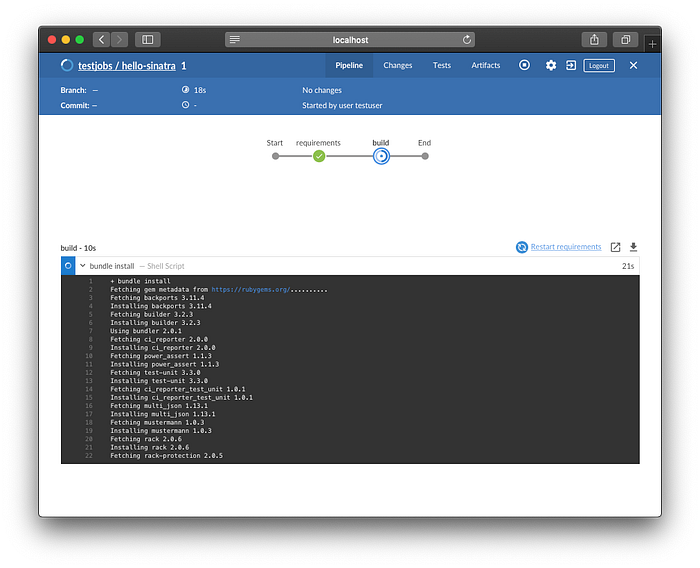
This will run through building installing the ruby gems and then running the tests. Once completed, click on Tests button at top to see the results.
Links
Pipelines As Code
- Technology Radar: Techniques — Pipelines as Code (Thought Works)
- Pipeline as Code: Introduction (Jenkins Documentation)
- Pipeline as Code using Jenkins 2 (Mayank Patel, Aug 2018)
Conclusion
This guide’s purpose was to introduce automating the creation of jobs, installing (seeding) jobs at startup, and an introduction to pipelines with Pipeline As Code Jenkinsfile.
In the future, I would to cover using triggers with githooks, pushing artifacts, and credentials. Stay tuned.