ExternalDNS w. GKE & Cloud DNS 2
ExternalDNS with static credentials to access to Cloud DNS
In a previous article, I covered how to use ExternalDNS to automate updating DNS records when you deploy an application on Kubernetes. This was done by giving all the nodes on Kubernetes access to the Cloud DNS zone. This was not desirable, as it allows anything running on the cluster to read and write records.
As an alternative, you can give access to only the ExternalDNS service by uploading a static credentials, called accounts keys, that will provide access to the Cloud DNS. This will grant access to only the target service, rather than the whole cluster, but there are some gotchas (below).
This tutorial will show how to setup ExternalDNS using static credentials on Google Kubernetes Engine using Cloud DNS.
📔 NOTE: This was tested on following below and may not work if versions are significantly different.* Kubernetes API v1.21
* kubectl v1.24
* gcloud 385.0.0
* ExternalDNS v0.11.0
Dangers of using static credentials
This method is requires automation and complexity to properly securely support the static credentials. The static credentials needs to be delivered to securely, and these credentials should be rotated frequently. The static credentials, should never be left around, especially on anyone’s laptop.
⚠️🚨 WARNING 🚨⚠️ Given the high risks of using static credentials (account keys), this method is not recommended for production usage.
Previous Article
Knowledge Requirements
This tutorial requires basic understanding of the DNS protocol, cloud platforms like GCP, and the container orchestration platform of Kubernetes.
Specifically, you will need to know how to setup Google cloud projects and resources using Google Cloud SDK (gcloud command), and configuring Kubernetes with KUBECONFIG environment variable, and using the kubectl tool to deploy resources.
Tool requirements
The following tools are needed:
- Google Cloud SDK 385.0.0 or greater
- Kubernetes client (
kubectl) v1.24 or higher
All client scripts were tested using using bash v5.1, (other POSIX shells should work) with Kubernetes v1.21.11-gke.900.
Setup
Use these environment variables and adjust as needed:
The DOMAIN_NAME will need to change to a domain that is under your control. The domain example.com will be used as an example domain for this tutorial.
Creating Google projects
There will be two projects: one to manage the DNS zones and another to run applications. It is a very common practice to segregate resources in this way, as it is easier to manage and keep secure.
You will need to know your billing account number, and use this to link the project to the billing account, so that you can create resources. You will also need to enable required API services related to the resources you wish to create.
You can do all this with the steps below:
Cloud DNS zone
If you do not yet have a Cloud DNS zone available, you can create one through these steps:
This should output a list similar to this:
ns-cloud-d1.googledomains.com.
ns-cloud-d2.googledomains.com.
ns-cloud-d3.googledomains.com.
ns-cloud-d4.googledomains.com.
Update domain registrar name servers
In this tutorial example.com is used as an example domain. If you own a domain that was registered with a third-party domain registrar, you should point your domain’s name servers to the values printed from the above list.
Create a cluster
A Kubernetes cluster will deploy containers across a pool of several worker nodes. This node pool is implemented as managed instance groups that manages several GCE (Google compute engine) virtual machine instances as a single set, scaling them up and down.
These instances will have a common identity, a GSA (Google service account), which needs to be created first (as per best practices). Afterward, the GKE is brought up using that worker node GSA.
Worker node GSA
Run the following below to create the worker node GSA, which will have the minimum necessary privileges.
⚠️ ️ NOTE: This step is vital as the default GCE service account has extra unnecessary privilege of role editor, allowing a potential malicious actor to grant more privileges.
Google Kubernetes Engine
Run the following below with the option to designate the worker node GSA:
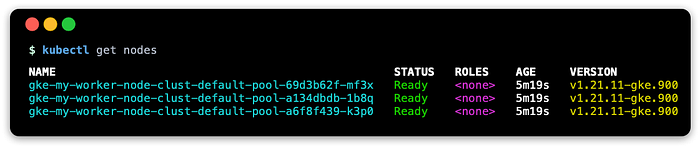
When the cluster comes up, you can test it with:
kubectl get nodesThis should show something like:
Create namespaces
In Kubernetes, a common practice is to install applications into separate namespaces.
Personally, I like to put cluster-wide solutions like ExternalDNS into kube-addons, and applications into their own unique namespace.
Here’s how you can create all the namespaces that are used in this project:
Granting access using using static credentials
Below is are steps that will create a new GSA, grant access to the GSA, download account keys for the GSA, and upload the account keys to Kubernetes.
Deploy ExternalDNS
Save the following below as externaldns.yaml.
This manifest will have the necessary components to deploy ExternalDNS on a single pod.
Before deploying, edit the file and replace $DOMAIN_NAME with the domain name, such as example.com, and also replace $EXTERNALDNS_NS with the desired namespace, such as kube-addons.
When ready, you can deploy this with:
kubectl create --filename externaldns.yaml \
  --namespace ${EXTERNALDNS_NS:-"default"}
You can look at the objects deployed with:
kubectl get all --namespace ${EXTERNALDNS_NS:-"default"}View logs
You can see right a way if ExternalDNS is successful or has trouble from the logs:
POD_NAME=$(kubectl get pods \
  --selector "app.kubernetes.io/name=external-dns" \
  --namespace ${EXTERNALDNS_NS:-"default"} --output name)kubectl logs $POD_NAME --namespace ${EXTERNALDNS_NS:-"default"}
A success should show something like the following:
time="2022-05-25T07:21:17Z" level=info msg="All records are already up to date"Verify with a service object
For quick demonstration that things are working, we can deploy a small nginx web server. For a service object, you use an annotation to confiugre the FQDN (fully qualified domain name) of the web service like nginx.example.com.
Save the manifest below as nginx.yaml:
Change $DOMAIN_NAME to a domain, such as example.com. When ready to deploy the ingress, run:
kubectl create --filename nginx.yaml \
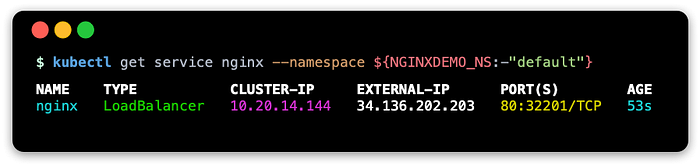
--namespace ${NGINXDEMO_NS:-"default"}Check to see if the service has an external address (this may take some seconds):
kubectl get service --namespace ${NGINXDEMO_NS:-"default"}You may see something similar to this:
Service: verify record changes on Cloud DNS zone
Verify records have been updated:
gcloud --project $DNS_PROJECT_ID dns record-sets list \
  --zone "${DOMAIN_NAME/./-}" --name "nginx.$DOMAIN_NAME."
This should show something like:

Service: query using dig
You can use dig to run a query against both the Cloud DNS name server and the default name server:
NAME_SERVER=$(head -1 <<< $NS_LIST)dig +short @$NAME_SERVER nginx.$DOMAIN_NAME
dig +short nginx.$DOMAIN_NAME
These both should show the public IP address that is registered in the Cloud DNS zone.
Service: test with curl
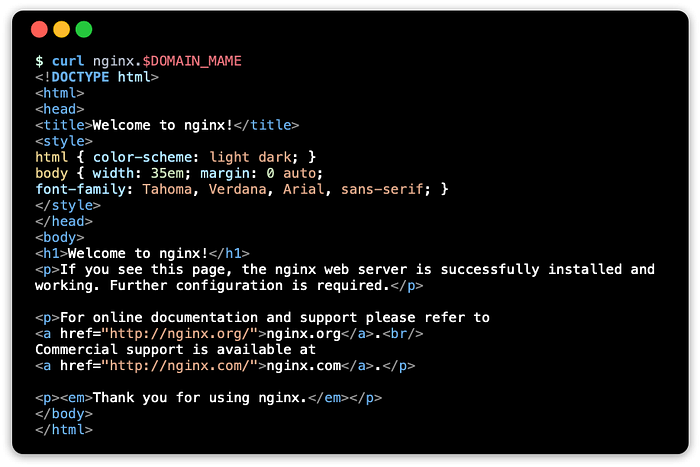
Use curl to get a response using the FQDN:
curl nginx.$DOMAIN_NAMEThis should show something like:
Verify with an ingress object
ExternalDNS supports ingress objects, where it will scan for new ingress objects and update the CloudDNS zone with record based on the host name in the ingress. The ingress controller will route incoming traffic to the appropriate backend service after it matches the value that was set in the host name.
⚠️ NOTE: This tutorial uses two endpoints, a service with an external load balancer and an ingress. This is only for demonstration purposes to illustrate configuring these resources for ExternalDNS. For practical purposes, only one endpoint is needed, so when the ingress is used, the service type can be changed to NodePort.
Default ingress controller: ingress-gce
GKE comes bundled with a default ingress controller called ingress-gce or GLBC, which is a GCE layer 7 (HTTP/S) load balancer.
As this load balancer sits outside of the Kubernetes cluster, it requires an IP address that is accessible from the external network, so services with the NodePort or LoadBalancer types will work fine.
A service with a type of ClusterIP is not directly accessible from outside of the cluster, so this is not supported.
This is different from popular ingress controllers like ambassador or ingress-nginx, which live inside of the cluster, so they can route traffic to IP addresses that are only accessible inside of the Kubernetes cluster.
Ingress manifests
Save the following below as ingress.yaml.
Change $DOMAIN_NAME to a domain, such as example.com. When ready to deploy the ingress, run:
kubectl create --filename ingress.yaml \
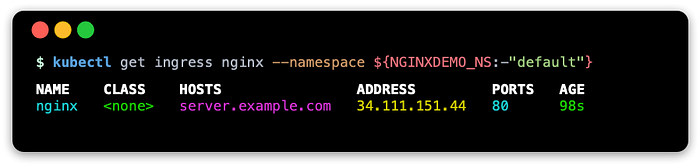
--namespace ${NGINXDEMO_NS:-"default"}Check to see if the ingress has an external address (this may take some seconds):
kubectl get ingress --namespace ${NGINXDEMO_NS:-"default"}You may see something similar to this:
Ingress: Verify record changes on Cloud DNS zone
Verify records have been updated to reflect the ingress object’s address:
gcloud --project $DNS_PROJECT_ID dns record-sets list \
  --zone "${DOMAIN_NAME/./-}" --name "server.$DOMAIN_NAME."
This should show something like:

Ingress: Query using dig
You can use dig to run a query against both the Cloud DNS name server and the default name server:
NAME_SERVER=$(head -1 <<< $NS_LIST)dig +short @$NAME_SERVER server.$DOMAIN_NAME
dig +short server.$DOMAIN_NAME
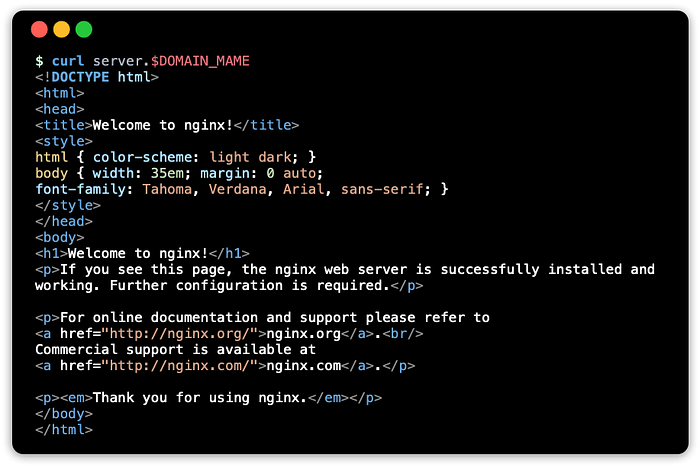
Ingress: test with curl
Use curl to get a response using the FQDN:
curl server.$DOMAIN_NAMEThis should show something like:
Cleaning up
You can delete the cluster and allocated load balancers with:
gcloud container clusters delete $GKE_CLUSTER_NAME \
  --project $GKE_PROJECT_ID --region $GKE_REGION
If the worker node GSA is no longer needed, you can delete it with:
gcloud iam service-accounts delete $GKE_SA_EMAIL \
  --project $GKE_PROJECT_ID
The DNS GSA and policy bindings are no longer needed, so they can be deleted with:
gcloud projects remove-iam-policy-binding $DNS_PROJECT_ID \
  --member serviceAccount:$DNS_SA_NAME \
  --role roles/dns.admingcloud iam service-accounts delete $DNS_SA_NAME \
  --project $GKE_PROJECT_ID
If the Cloud DNS zone is no longer needed, it can be deleted with:
gcloud dns managed-zones delete "${DOMAIN_NAME/./-}"Resources
These are some documentation links and resources I have come across while doing this blog
Google Documentation
- Authentication overview
- Best practices for using and managing service accounts
- Harden your cluster’s security
- Security Overview
- GSA (Google Service Account)
- Service Account Keys
ExternalDNS
This tutorial is based on docs I updated to the ExternalDNS project
- ExternalDNS GKE tutorial (latest)
Conclusion
Similar to the previous article, the goal is to demonstrate ExternalDNS on GKE with Cloud DNS, and walk through using gcloud and kubectl tools to set all of this up.
The secondary take away is to exposure to identities that are configured to access the resource. In the previous article, a GSA (Google service account) associated to the Kubernetes nodes (GCE virtual machines instances managed by MIG) was configured to provide access to Cloud DNS, which is a process called IAM policy binding.
In this article, a new GSA is created with configured to access to Cloud DNS, and service account keys for this GSA was delivered to ExternalDNS.
This solution should only be used as a last resort or for limited testing. For services that need read-write access to a resource, this can be secured using the KSA (Kubernetes service account) using Workload Identity and an OpenID Connect provider. This will be covered in a follow-up article.